
In This Article
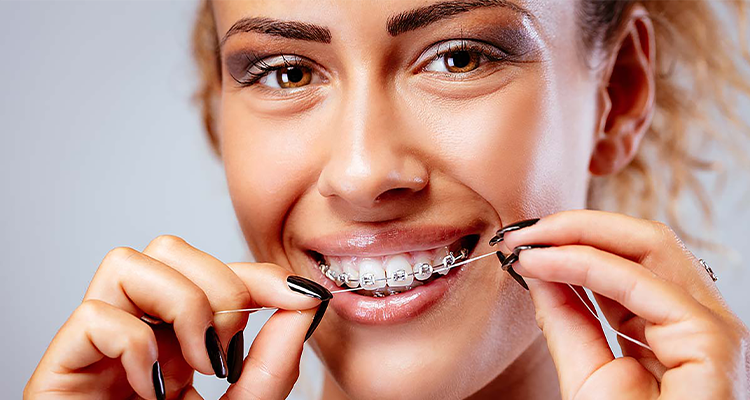
How to Floss with Braces Like a Pro
May 10, 2023
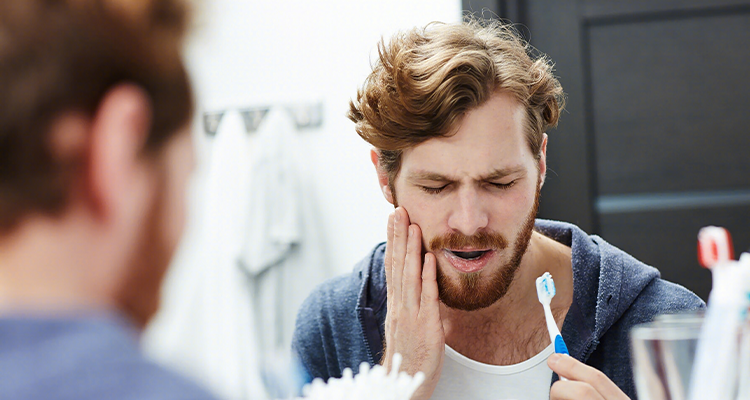
Getting braces is an exciting first step toward a more attractive and healthier smile. However, maintaining good oral hygiene can be challenging when brackets and wires are in your mouth. Flossing is one of the most important aspects of oral care during orthodontic treatment. The American Dental Association (ADA) reports that only around 60% of tooth surface area is effectively cleaned by brushing alone, leaving 40% of teeth vulnerable to decay and gum disease. But flossing with braces can be tricky. In this post, we will show you how to floss with braces like a pro so that you may maintain healthy teeth and gums during your orthodontic treatment.
Why is Flossing Important with Braces?
Flossing is essential during orthodontic treatment because braces create extra space for accumulating food particles and bacteria.
Cavities and gum disease are possible outcomes of food and plaque lodged in braces. This buildup can lead to unsightly white spots on teeth and even permanent damage if left unaddressed.
Additionally, braces can make removing food particles and plaque harder with brushing alone, making flossing even more important. Also, note the common question of flossing first or brushing first.
Regular flossing helps maintain healthy gums and teeth by eliminating food debris and plaque between teeth and under the gum line. Neglecting to floss can lead to cavities or gum disease, which can ruin and prolong your braces treatment. The American Dental Association recommends flossing at least once a day to keep your teeth and gums healthy.
Now that you know why flossing with braces is important, neglecting to floss can lead to food buildup, plaque buildup, and gum disease. So it's time to demonstrate how to floss with braces like a pro! We have prepared the instructions for traditional dental floss and water floss.
Have a look and find out what you will get!
How to Floss with Braces Like a Pro with Traditional Floss?
Step 1: Gather Your Supplies
Before you begin flossing with braces, it's essential to gather the necessary supplies:
- Dental floss. Unwaxed or waxed dental floss is suitable. Some prefer floss threaders or orthodontic floss designed for braces.
- An orthodontic wax. This can be helpful to cover any irritating wires or brackets.
- A mirror. A well-lit area with a mirror will enable you to clearly see what you're doing.
- A clean towel or tissue. This will help you wipe away excess saliva during the process.
Step 2: Wash Your Hands
To begin, run some soap and water through your hands. Clean hands are essential to avoid introducing additional bacteria into your mouth.
Step 3: Prepare the Floss
Cut a piece of dental floss approximately 18 inches long. This length should provide enough floss to work with while ensuring you have a fresh section for each tooth.
Step 4: Thread the Floss
For those who prefer traditional dental floss, follow these steps:
- Thread one end of the floss through the eye of a floss threader, or use a floss threader designed for braces.
- Carefully guide the threaded floss under the archwire of your braces, pulling it through so you have two equal lengths on each side of the wire.
Step 5: Floss Between Teeth
Now, let's focus on the actual flossing process:
- Keep a little length of floss between your thumb and fingers to work with.
- To clean the space between two teeth and remove food and plaque, gently glide the floss and move it up and down in a "C" form. Avoid detrimental pressure if you want to keep your braces and gums in good shape.
- Repeat this process for each set of adjacent teeth, moving the floss to a clean section as needed.
Step 6: Clean Around Brackets and Wires
It's important to floss thoroughly. Therefore, cleaning around the brackets and wires is worth the effort:
For individuals using a floss threader, slide the floss under the archwire as you did between the teeth.
Once the floss is below the archwire, follow the same "C" shape motion to clean around the bracket and between the teeth.
Take your time to ensure all sides of the bracket and the areas between teeth are thoroughly cleaned.
Continue this process for each bracket, using a fresh section of floss as you move to the next one.
Step 7: Check for Irritation
Pay attention to any wires or brackets irritating your cheeks or gums during flossing. Consider applying a small amount of orthodontic wax to the problem area if you notice any. This wax can provide relief and prevent further irritation.
Step 8: Rinse and Repeat
After flossing between each tooth and around the brackets, rinse your mouth thoroughly with water or an antimicrobial mouthwash. This will help remove any loosened debris and bacteria from your mouth.
How to Floss with Braces Like a Pro using Sodentist Water Flosser?
A completely different and very thorough way to clean between teeth and around braces is to use a dental flosser. There's a reason orthodontists and dentists spray water directly on teeth to clean teeth and braces. As an extra step to brushing and flossing daily, a water flosser for braces wearers is one of the best methods for a deep oral clean.
Sugar, food debris, and plaque can accumulate between teeth, along the gum line, and around brackets and archwires. A flosser like the Sodentist produces a powerful, continuous water spray to eliminate this buildup.
Cleaning your braces and teeth with Sodentist is easy and refreshing. You can finish this as follows:
Step 1. Fill the water tank with warm water, then insert the flosser tip into the water flosser handle.
Step 2. Lean over the sink and gently close the flosser with your mouth.
Step 3. Set the flosser to low pressure before starting. Pressure can be increased once used.
Step 4. Please turn it on and spray it directly on the gum line, starting from the back teeth and moving to the front teeth. Spray water along the outer and inner gum lines, spray around the entire base of each tooth, and spray directly on the braces.
Step 5. Move to the next tooth and repeat until you have flossed your entire mouth.
You'll find that many Sodentist water flosser kits come with special orthodontic tips that are shaped for cleaning braces, but regular tips will work just as well.
Conclusion
These are all the steps of how to floss with braces like a pro! It's a must to keep your teeth healthy and avoid cavities. Remember to use a floss threader or special orthodontic floss, be gentle, and take your time to thoroughly clean between all teeth and around the wires and brackets. If you take the time to develop a personal flossing routine, you may maintain healthy teeth and gums throughout your orthodontic treatment.
Share this article